Your TV looks “fine,” but not like the demos—what’s actually missing?
You set up the TV, pick the “4K” input, and the picture looks fine—clean, bright, watchable. Then you remember the store demo: deeper highlights, richer color, smoother motion. At home, HDR looks weak or never shows up, 4K menus feel inconsistent, or a console won’t offer 120Hz even though the box says it should.
The missing piece is usually not a new TV. It’s that the best HDMI mode is hidden behind the “right” port choice, a buried enhanced-signal toggle, and a cable chain that can quietly cap bandwidth. You can fix most of this in minutes, but only if you know where to look.
Start by treating HDMI like a system, not a single plug: the port, the TV setting, and every link in between decide what features you actually get.
Trick #1: The ‘right’ HDMI port usually isn’t HDMI 1—how to spot the good one

Once you treat HDMI like a system, the first surprise is that the “best” port often isn’t the one you grabbed first. Many TVs only give full bandwidth (4K at 120Hz, VRR, the strongest HDR formats) on one or two inputs, and the rest are capped. Plug a PS5, Xbox, or high-end streamer into the wrong port and the device will quietly fall back—no 120Hz option, HDR that won’t engage, or settings that keep flipping back.
Flip the TV around and read the labels printed next to the ports. Look for “HDMI 2.1,” “4K/120,” “8K,” “VRR,” or “(ARC/eARC).” On some sets, the good ports are HDMI 3 or 4, while HDMI 1 and 2 are “4K/60” only.
One trade-off: the port labeled eARC might also be one of the only full-speed ports, so you may have to choose what gets that premium slot until you check the rest of the chain.
Trick #2: That hidden ‘Enhanced/Deep Color/Input Signal Plus’ toggle is the difference-maker
That “premium slot” decision gets easier once you realize many TVs ship with their best HDMI mode turned off by default. You can plug into the correct port and still get a “fine” picture because the TV is running that input in a safe, lower-bandwidth mode. The result looks like symptoms: HDR doesn’t appear, Dolby Vision won’t trigger, 4K is available but color looks flat, or a console suddenly offers 120Hz only after you change something unrelated.
The fix is a per-input setting with different names: “HDMI Enhanced,” “HDMI Ultra HD Deep Color,” “Input Signal Plus,” “Enhanced format,” or “4K Mode.” Turn it on for the specific HDMI port your device uses, then power-cycle the device (or unplug/replug HDMI) so it renegotiates the signal. If you enable it and the screen goes black or flickers, that’s useful information: one link in the chain can’t handle the higher mode.
Before buying anything, test with the device connected directly to the TV using your shortest known-good cable. If it stabilizes, the next section is where the real bottleneck usually shows up.
When the picture cuts out or HDR won’t stick, the cable chain is usually the culprit
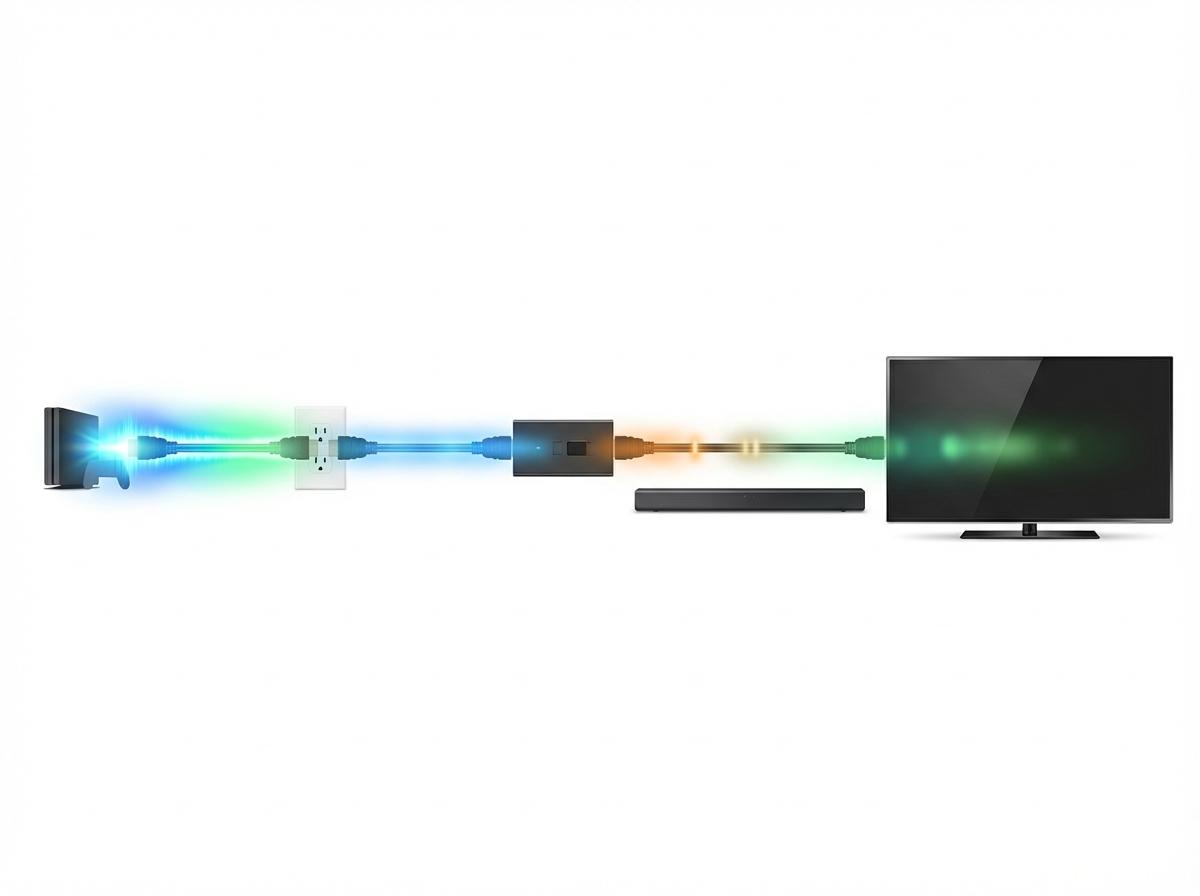
If the picture stabilizes when you go straight into the TV, problems that look “random” usually aren’t random. They’re coming from the cable chain: a too-old HDMI cable, a long run, a wall plate, a switch, an extractor, or even a soundbar in the middle that can’t pass the higher-bandwidth signal you just enabled. The TV and device keep trying to agree on 4K/HDR/120Hz, fail, and fall back—so HDR appears once, then disappears, or the screen cuts out for a second when you start a movie.
The practical move is to add complexity one link at a time. Start with TV ↔ device using a short, certified Ultra High Speed HDMI cable. Then reinsert the soundbar, then any adapter or switch. If HDR “sticks” until you add one piece back, that piece is your limiter.
One trade-off: “it works at 4K/60” can hide a chain that breaks at 4K/120 or Dolby Vision—so test the exact mode you plan to use before you tidy cables and call it done.
Trick #3: ARC/eARC settings that fix ‘soundbar works… sometimes’
That same “add one link at a time” approach explains why a soundbar can work for Netflix, then go silent on a console, then come back after a reboot. ARC/eARC only works on the TV’s ARC/eARC-labeled HDMI port, and the TV has to be told to send audio out over it. If the bar is plugged into a non-ARC port, or the TV is still using TV speakers, you’ll get intermittent routing that feels random.
In the TV’s Sound settings, set output to HDMI ARC/eARC (not Optical, not TV Speaker). Then set Digital Audio Output to Auto/Pass-Through so the TV doesn’t downmix everything to stereo. On the soundbar, make sure the input is “TV (ARC/eARC),” not a regular HDMI-in.
One real friction: eARC can expose a weak cable. If you get dropouts, test with a shorter known-good HDMI cable between TV and bar before you change anything else. After that, the setting that makes it all effortless—and sometimes breaks it—is CEC.
Trick #4: CEC can make everything seamless—or randomly break it
That “effortless” part is HDMI-CEC: you hit the Apple TV remote, the TV turns on, the soundbar wakes, and volume “just works.” Then one day, the console turns on by itself, the TV jumps inputs mid-movie, or the soundbar steals audio until you power-cycle everything.
CEC is the control layer over HDMI, and every device brands it differently (Anynet+, Bravia Sync, Simplink, VIERA Link). If you want one-remote behavior, turn CEC on for the TV, the streamer/console, and the soundbar. Then keep it simple: avoid plugging two “bossy” devices into the same chain (for example, a streamer into the soundbar’s HDMI-in while also using ARC/eARC).
The trade-off is reliability. If CEC causes input switching or wake-ups, disable it on the problem device first (often the console), but leave ARC/eARC on so audio still routes correctly. Now prove what’s actually active.
A 5-minute confirmation run: prove you’re getting the best your gear supports
“Now prove what’s actually active” is a quick run you can do any time something feels off. Start with the simplest chain: device → TV (short, known-good cable). On the TV input, confirm the Enhanced/Deep Color toggle is on, then open the TV’s Info/Signal screen and verify it reports 4K plus HDR (or Dolby Vision) when you play known HDR content. On a console, check Video Output and make sure 120Hz/VRR show as supported.
Then add pieces back one at a time: soundbar, then any switch/wall plate. After each step, re-check the same Info screen and the same console/streamer status page. If a feature disappears or flicker starts right after adding one link, you’ve found your limiter—and you can decide whether to reroute, shorten, or replace just that part.